
Step 1: Check for a factory light connector
Several mower makers build the wiring for lights into the machine and sell the lamps as a kit. Before you cut into the harness, find out whether yours is one of them.
| Kit | Fits | How it connects | What else comes with it |
|---|---|---|---|
| John Deere LED Light Kit (manual UC34324) | Residential ZTrak Z315E, Z320M, Z320R, Z325E, Z330M, Z330R, Z370R | The kit harness plugs into a main harness connector under the storage compartment cover | Left and right light assemblies, self-tapping screws |
| Toro Light Kit 107-9880 | Z400 and Z500 Series Z Master | Plugs into an open connector on the main wire harness; diesel models without one use an adapter harness | A 20 A fuse; on the Z500, a template for drilling 3/8 inch holes in the footrest |
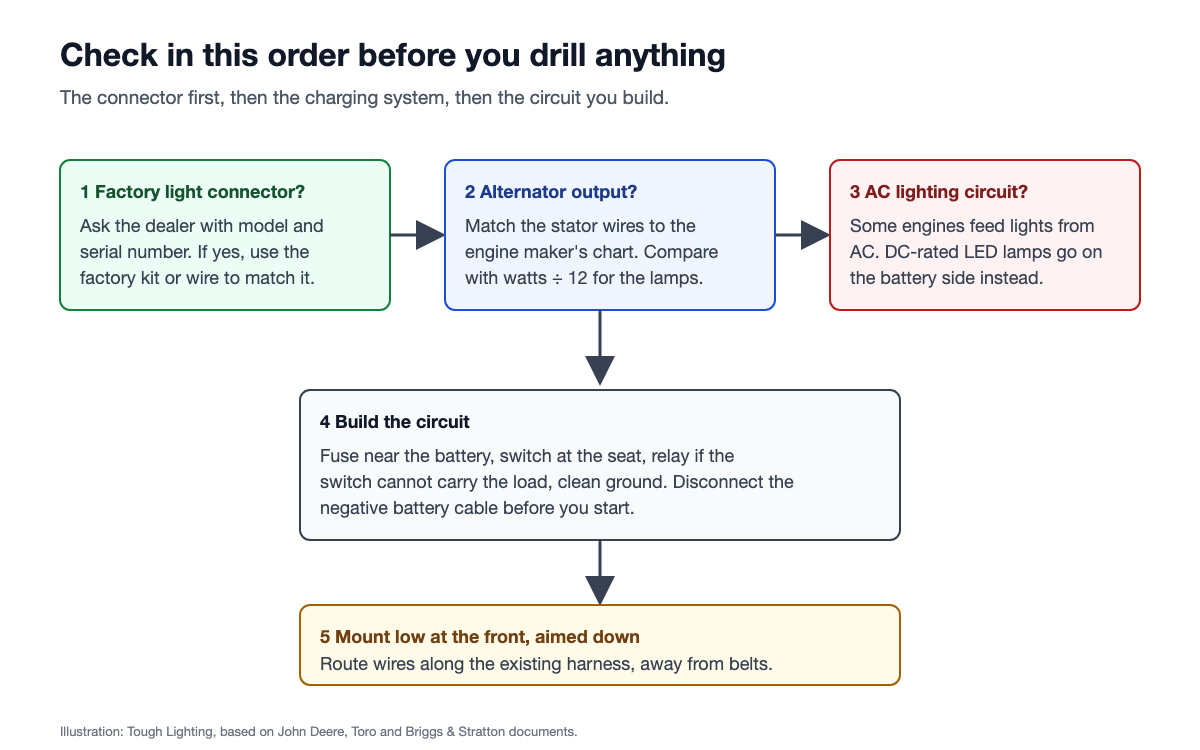
If your model has a connector like this, the factory kit or a lamp wired to match it is the cleanest job: no splicing and no guessing at circuit capacity, because the maker designed that circuit for lights. The dealer can tell you whether a connector is fitted from the model and serial number.
If there is no connector, you are building a new circuit, and the next four steps matter.
Step 2: Add up the current before you choose lamps
A small engine's charging system is much smaller than a car's. Briggs & Stratton's alternator chart for its engines runs from 0.5 A DC unregulated at the bottom to 60 A DC regulated at the top, with many common outputs in the 3 to 20 A range. The lamps you add have to share that output with everything else on the machine, including recharging the battery after every start.
To estimate what a lamp draws, divide its wattage by the system voltage. On a 12 V mower:
| Lamps fitted | Total power | Approximate current at 12 V |
|---|---|---|
| Two 10 W lamps | 20 W | 1.7 A |
| Two 12 W lamps | 24 W | 2 A |
| Two 18 W lamps | 36 W | 3 A |
| Two 12 W front and one 18 W rear | 42 W | 3.5 A |
Two 18 W lamps would use the whole output of a 3 A unregulated alternator, leaving nothing to recharge the battery while they are on. On a small engine, fewer or smaller lamps are the safer choice.
To find out what your engine has, Briggs points owners to its alternator identification chart, which matches the stator wires and connector colour to an output rating. For a quick check that the charging system works at all, Briggs suggests switching on the headlights and then switching off the engine. If the lights dim, the alternator was working.
Watch for an AC lighting circuit
The same Briggs chart lists alternators with a separate AC output for lights, and others with an unregulated DC output reserved for lights. On those engines the original headlights may never have been connected to the battery. LED work lamps with an internal driver are built for a DC supply; ours are rated 9 to 32 V DC. Wire them to the battery side of the system through a fuse, not into a lighting circuit you have not identified.
Step 3: Fit a fuse and a switch
Every factory kit in this guide comes with circuit protection. Toro's Z Master kit includes a 20 A fuse, and Toro's light kit for its Sand Pro 2040Z utility machine includes a 15 A fuse and a rocker switch. Those ratings belong to those kits and their harnesses, so do not copy them onto a different circuit. The point is that the maker never wires a lamp straight to the battery, and neither should you.
Before you start, do what Toro's instructions tell you to do first: park on level ground, lower the deck, shut off the engine, engage the parking brake, remove the key and disconnect the negative battery cable.
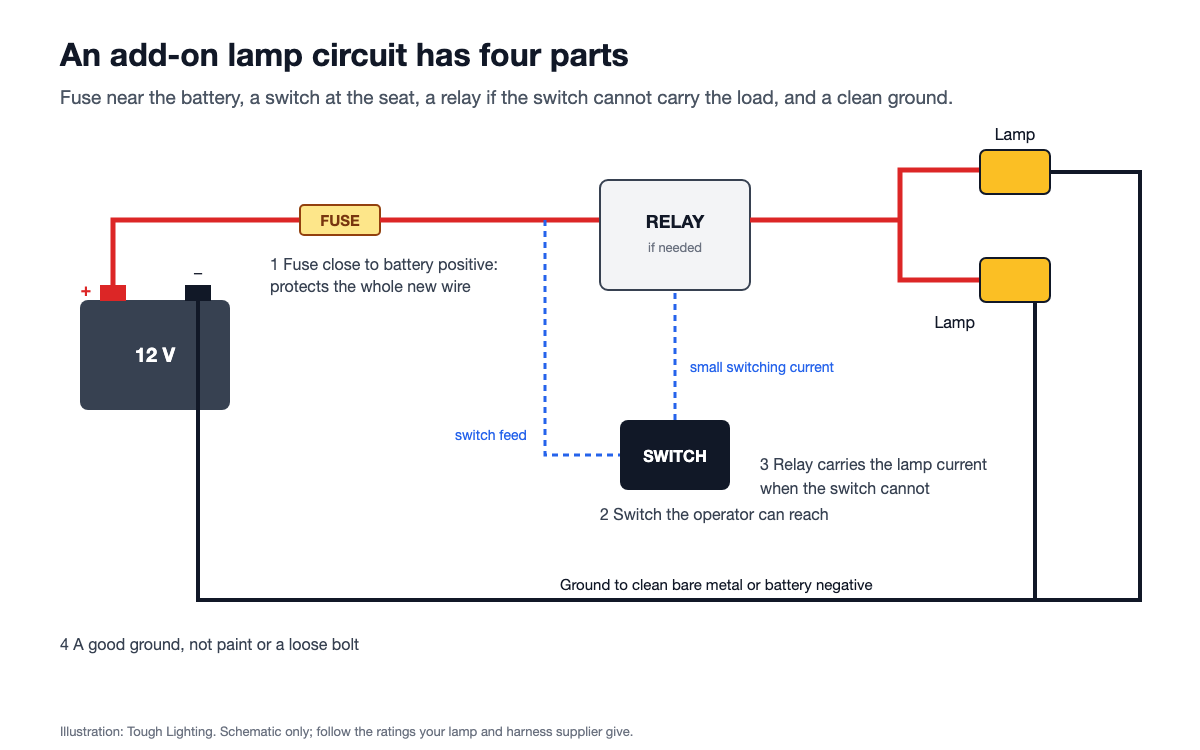
A complete add-on circuit has four parts:
- A fuse close to the battery positive terminal. It protects the new wire along its whole length.
- A switch the operator can reach from the seat. Ask your harness supplier or lamp maker for the rating to match the lamps you fit.
- A relay, if the switch cannot carry the lamp current itself. The switch then only drives the relay coil, and the lamp current runs through the relay.
- A ground to clean bare metal, or to the battery negative terminal, so the return path does not depend on paint or a loose bolt.
If you would rather not build this from loose parts, a custom wiring harness can arrive with the fuse, relay and switch already fitted for the number of lamps you plan to run.
Step 4: Mount the lamps where they light the grass
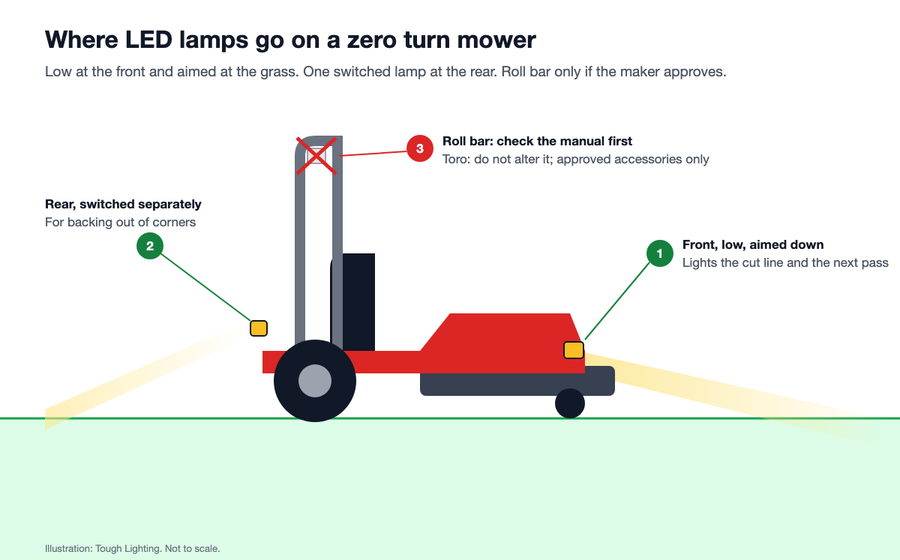
On a zero turn the useful light is on the grass just ahead of the deck, where the operator is looking as the machine turns. The factory kits put their lamps low at the front: Toro's Z500 kit mounts them on the footrest, and John Deere's kit fits a light assembly on each side.
- Front, low and aimed down. Lamps here light the cut line and the next pass without shining back into the operator's eyes.
- Rear, if you mow in reverse or tow. One lamp aimed behind the machine helps when backing out of corners. Keep it switched separately so it is only on when needed.
- Not on the roll bar, unless the maker approves it. Owners often clamp lamps to the roll bar because it is high and easy to reach. Toro's instructions for the roll-over protection system on its TimeCutter HD and Titan mowers say not to repair or alter its components and to use only Toro-approved accessories with it. Check your own mower's manual before you attach anything there.
Route the new wires along the existing harness, away from the deck belt, the exhaust and the moving steering arms, and secure them with cable ties so they cannot rub through as the frame flexes. Toro's instructions route the kit harness along the existing wiring in exactly this way.
A flood beam is the usual choice. Mowing is close work, and a wide flood beam lights the area in front of the deck more evenly than a long-range spot. Our article on lumens and lux explains why the light on the ground matters more than the lumen figure on the box.
Step 5: Plan for water and washing
A mower gets hosed down, sometimes with a pressure washer, and it works in wet grass. Choose lamps with an IP rating that covers what you will actually do to them; the IP ratings glossary explains what each rating is tested against. Seal any connector you add, and keep it off the bottom of the frame where water collects.
Which lamps suit a zero turn
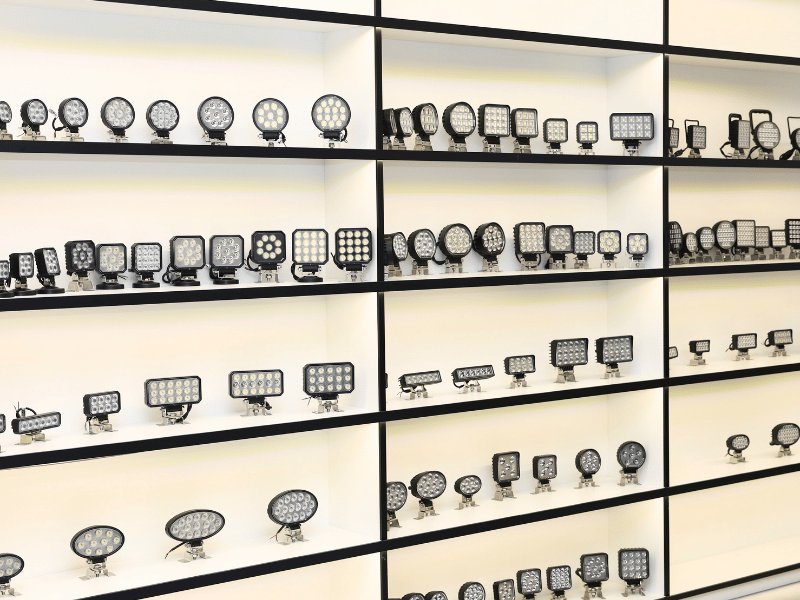
Small, low-power lamps fit the charging systems in Step 2 best. Our LED work lights include 2 inch to 4.5 inch lamps from 10 W to 18 W, all rated 9 to 32 V DC, in round, square and rectangular housings that fit a footrest, a bumper or a clamp bracket.
Frequently asked questions
Do John Deere zero turn mowers have lights?
Some residential ZTrak models accept John Deere's LED Light Kit, which plugs into a connector on the main harness under the storage compartment cover. John Deere's instructions list the Z315E, Z320M, Z320R, Z325E, Z330M, Z330R and Z370R. Check your model with a dealer before you order.
How do you put lights on a zero turn mower?
Check for a factory light connector first. If there is none, add up the current, fit a fuse near the battery and a switch the operator can reach, use a relay if the switch cannot carry the load, and mount the lamps low at the front, aimed down.
Can LED lights run off a mower battery?
Yes, if the charging system can keep up. Divide the lamps' total wattage by 12 to get the current at 12 V and compare it with your engine's alternator output. Some small-engine alternators put out only a few amps.
Can I connect LED lights to the mower's headlight wires?
Only if you know what that circuit is. Some engines feed their lights from a separate AC lighting circuit, and LED work lamps rated for DC need a DC supply. If you are not sure, wire the new lamps to the battery through their own fuse.